Thursday, July 31, 2008

Flash Final

Final Project Notes
  • When you bring in a graphic from elsewhere, it will have a white background, so you either have to trace it and save it as a movie clip, or if you cut it out with the magic wand in photoshop, you can just save it as a photoshop file. But JPG files will always end up with the white background instead of transparent.
  • To get a movie to play more slowly, you can change the frames per second in the properties menu.
  • You can make one flash file that will link to another flash file. For example, a list of buttons that can be clicked to make your movie play.
  • Tweener has open source code you can use to help with flash code.

Mayer's Principles - Summary
Applying high quality multimedia design improves learning:
  • Spatial Contiguity Principle - When corresponding words and pictures are presented near rather than far from each other on the page or screen
  • Temporal Contiguity Principle - When corresponding words and pictures are presented simultaneously rather than successively
  • Coherence Principle - When extraneous words, pictures, and sounds are excluded rather than included
  • Modality Principle - From animation and narration than from animation and on-screen text
  • Redundancy Principle - From animation and narration than from animation, narration, and on-screen text
Individual Differences Principle Instructional Implications:
  • Individualization: Pros - Addresses multiple learning types; Cons - Learner Classification risk, Unbalanced instruction
  • Multiple Methods: Pros - Allows each learner type to filter out information; Cons - Creates redundancy, Violates coherancy
  • Pre-Training: Pros - Prepares low knowledge learners for the multimedia presentation; Cons - Requires more time/resources up front

Thursday, July 17, 2008

Flash Lectures 6 & 7

Modality Principle
Students learn better when words in a multimedia message are presented as spoken text rather than printed text.

Having pictures and text at the same time is overload for the eyes. (Particularly if it is a movie and you have limited time to process what you are seeing.) You only want one thing at a time per channel (audio and visual).

Redundancy Principle
Students learn better from animation and narration than from animation, narration, and text.

Redundancy Effect:
A situation, experience, circumstance, or condition where eliminating, reducing, or getting rid of redundant, superfluous, unnecessary, unneeded, extra material, objects, bits and pieces, or examples results in better, improved, increased, more successful performance than when the redundant, superfluous, unnecessary, unneeded, extra material is included or kept.

*BETTER*
Redundancy Effect:
Eliminating redundant material results in better performance.

Thursday, July 10, 2008

Flash Lectures 4 & 5

Buttons
Expand "Action" -> Type "on (" and a list of choices will open for you
Complete code: on (release) {play();}

To highlight both the shape and its outline, you can use the lasso tool.

Easier way to create a path of motion:
Use the motion guide layer to draw the path you would like it to take.
"Ease" in the property box can change the speed of the motion.

Thursday, June 26, 2008

Flash Lectures 3 & 4

If you just want motion, but the shape is staying the same, save it as a symbol.
If you are changing to another shape, you need to save it as a bitmap.

Modify -> Break Apart
then you can use the lasso tool to select only the part of the picture you want.

Insert -> New Symbol to add a new item to a scene.

Assignements:
Lecture 2 - 1 & 2
Lecture 3 - Just 1
Lecture 4 - Assignment 1; a & b

Thursday, June 19, 2008

Flash Lectures 1 & 2

Tools
Solid arrow - Click on solid arrow when you're finished. It also moves things around.
White arrow - use to drag, like handles on shapes
Free Transformation (box with dot inside) - change size & free rotate
Lasso -
Line -
Text -
Pen - creates multiple anchor points
Circle
Square
Pencil
Ink Bottle
Paint Bucket
Eraser
Eye Dropper

Movement:
Click on frame one.
You need to convert it into a symbol instead of bitmap
Modify -> convert to symbol -> graphic
(You can't erase a symbol.)

Click on a later frame on the timeline.
Insert -> Timeline -> Keyframe

Properties -> Tween -> Motion

Control -> Test Movie

To undo your conversion to symbol,
Modify -> Break Apart

Change Shape:
Properties -> Tween -> Shape
(You will have to delete the first shape when you are on your key frame.)

Homework:
Export -> Export Image -> save as .swf


Thursday, June 12, 2008

Photoshop Lecture 6

Classwork:


Coherence Principle
Students learn better when extraneous material is excluded rather than included.
1. Student learning is hindered when interesting but irrelelvant words and pictures are added to a multimedia presentation.
WHY?
  • Irrelevant material may direct the learner away from relevant material.
  • Irrelevant material may disrupt the learner's building of cause-and-effect chains.
  • The learner may assume the theme comes from the seductive details.

2. Student learning is hindered when interesting but irrelelvant sounds and music are added to a multimedia presentation.
WHY?
  • There is limited capacity in auditory and visual channels.
  • Processing capacity is limited.
  • Irrelevant sounds and music will result in poor retention and transfer.

3. Student learning is improved when unneeded words are eliminated from a multimedia presentation.

WHY?
  • helps students to quickly process information
  • facilitates the process for retaining information
  • Use key words in the captions.
  • Present information in order
  • Present information near corresponding illustrations.

Homework:


Thursday, June 5, 2008

Photoshop Lecture 5

Erase Tool
Brush
Opacity 42%
Flow46%
(allows only part of the picture to be erased instead of the whole thing)


Magic Wand
change the tolerance if it is selecting too much or too little of the picture.

Matting
Image -> Canvas Size (to change the size of the whole project - it can also help you add a border)
You can also use the square marquee to select an area to make another mat layer. OR simply select the layer you want to add the mat border to and... Edit -> stroke

Filter -> Noise -> Add Noise -> Gaussian
Filter -> Texture -> Texturizer


Temporal Contiguity
Presenting verbal information and animation simultaneously (rather than successively) can help students connect the images with the verbal information better, allowing them to have deeper understanding and transfer of information.

Filter
Filter -> render -> lens flare
Filter -> blur -> motion blur


Assignment

Thursday, May 29, 2008

Photoshop Lecture 4

The magic wand IS magic!
It will select every area of the picture that is the same color, allowing you to cut an image out of its background.
Hold the shift key down and continue to select all the image you want to cut out.
Go to "select" -> "Inverse" to select just the picture instead of the background.
Go to "Select" -> "Save Selection" to save it as a new image with just a white background.
You can also copy and paste the selected area.

Use "Edit" -> "Free Transform" to manually change the size and shape of objects.

The smudge tool can help smooth out rough transitions between pieces you paste.


Spatial Contiguity
How close is your text to the pictures or graphics that go with it?
Theories:
  • When related text and pictures are placed closely together, it shows the relationship between them more clearly and easily for the reader.
  • When they are separated it forces the reader to make the connections between the text and pictures.
So, which is better?
Studies show that integration of text and pictures helps learners when reading informational text.

Are pictures necessary?
It depends upon the level and prior knowledge of your learner.
Pictures can also repeat information, giving the learner two opportunities to take in the information.

Presentations
25 Points
Must have a powerpoint
Must have real-life examples
Our presentation is due June 5.

Assignments

Thursday, May 22, 2008

Photoshop Lecture 3

When transforming an image, if you hold the shift key down it will transform to scale keeping the proportions.

Tools to try:
Warp Text


Gradient Tool - You can choose what colors you would like to have in your gradient, then just click and drag a line across your screen to place the gradient.

Resize your image:
Image -> Image Size
Change to percent
You can deselect constrain proportions if you want to.

Mask Tool
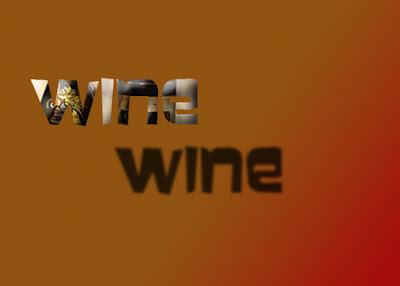
puts the picture inside the text

Select -> Save selection
can save just the one part you want for later use

Edit -> Stroke

Image -> Canvas Size


Filter -> Distort

Lecture 3, Assignment 1:

Extra Credit:

Thursday, May 15, 2008

1st Day of Class

Instructor Website
Class Website

Adobe Photoshop:
Resolution - 350 BPI is book printing quality

Color Mode - RGB Color = Red Green Blue
RGB is more commonly used - it has two choices for bits: 8 or 16


jpg file formats have three channels, red, green, and blue; extra areas are white only
jpg is a static file format
jpg is compressed

gif can be used for animation
gif file formats have other channels to create effects, like a transparent effect
gif files is less compressed than jpg because of the fourth channel

png and tif file formats are more commonly used for printing because they are compressed but not as much as jpg and gif.

Bitmap - a four channel option, not compressed
Bitmap is even bigger than gif
Bitmap is the largest

CMYK Color - used by printing companies

Image Menu:
duplicate - always make a copy of your photo
image size
adjustment -> levels
adjustment -> levels -> options
variations
selective color
Gradient Map

Before exporting an image, go to
Image -> flatten image
to make it one layer to export

To export:
save as
select file type
select size 12 to get better quality


Emboss Effect:
Layer -> Lyer Style -> Bevel Emboss